Industrial automation is not new. But it is time to create a better modbus iot
integration for a
deeper understanding of your data and also manage your devices in a efficient way.
In the Industry 3.0, devices are managed in an isolated fashion. From late 1960s to early 19790
PLCs , DCS and few more ways to automate the simple process came into existence. In addition,
With the introduction of Modbus, programmers were able to mange them and automate a few of the
process in a localized fashion.
But these machines are still managed in the same isolated way in many industrial sectors.
However It is time to integrate them for a more productive outcome. Over the last few months, we
tried writing some code to integrate data received from Modbus/RTU into MQTT Broker. The
integration was very simple and straight. But One of the major challenge is the association of
the data we read from the Modbus Server to the actual spec as provided by the Manufacturer.
Modbus Protocol, a messaging structure developed by Modicon in 1979, is used to
establish
master-slave/client-server communication between smart devices. It is a de facto standard, truly
open and the most widely used network protocol in the field of industrial automation. It has
been implemented by hundreds of vendors on thousands of different devices to transfer
discrete/analogue I/O and route data between control devices.
Modbus is used in multiple master-slave applications to:
Modbus is used in a number of smart manufacturing solutions. But Modbus is not only an industrial protocol. Its benefits are also evident in the building, agriculture, transportation and energy applications.
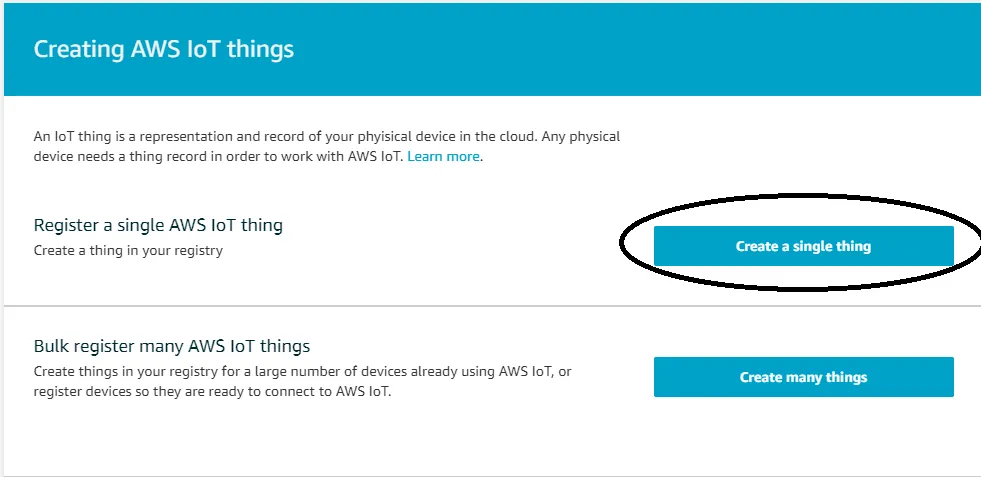
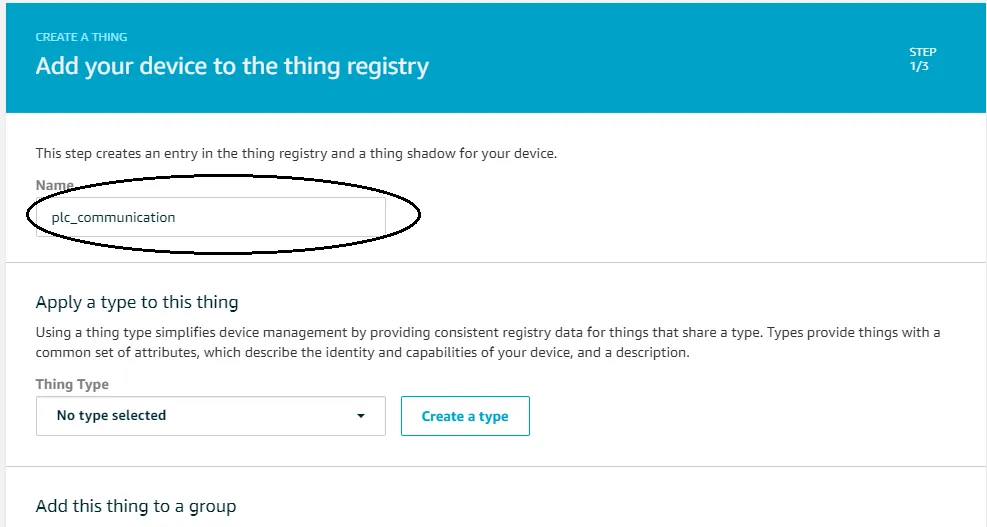
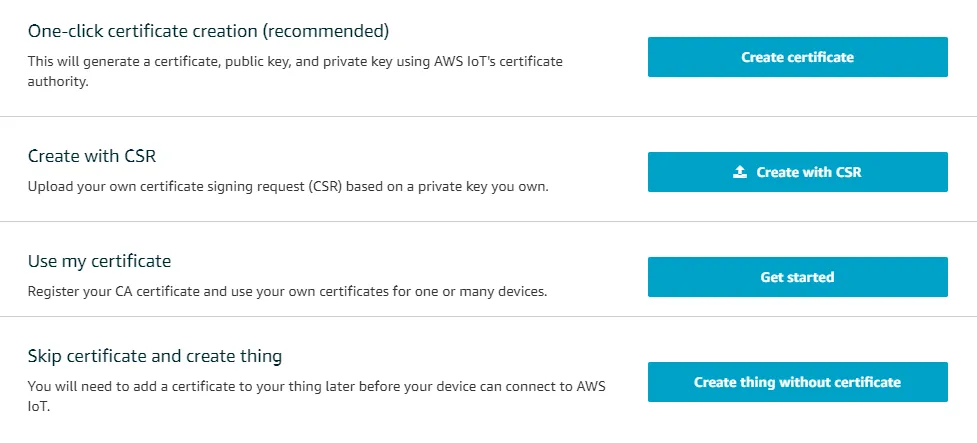
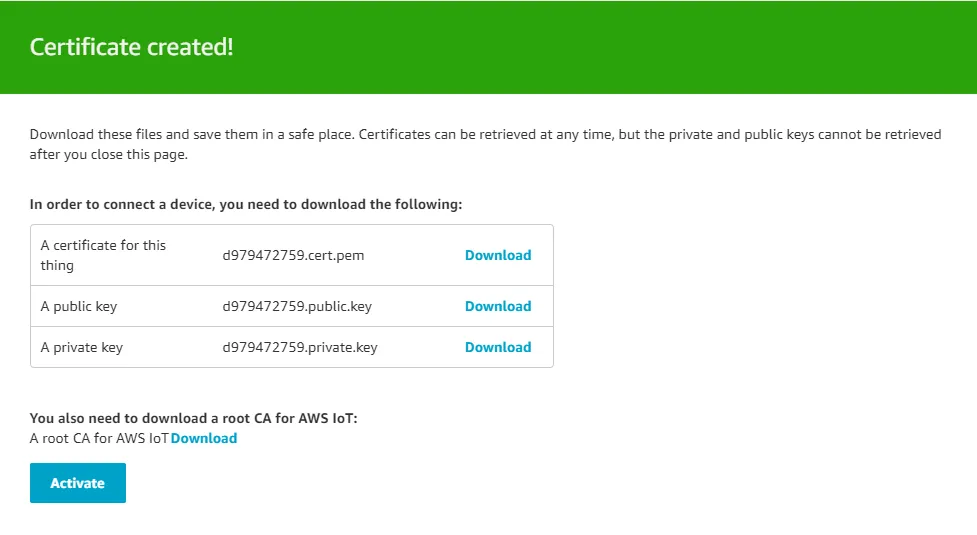
We have used Raspberry Pi 3B+ for creating the gateway to gather the Modbus data and push data to AWS IoT Core (MQTT Broker).
We used the pymodbus python implementation of the Modbus IoT gateway. This will
query
the data
from the Modbus RTU PLC. Using the pymodbus implementation, you will be able to read and write
data into the the memory registers & Coils of your equipment.
So let’s see how are we gonna implement the system.
                      {
                      "Version": "2012-10-17",
                      "Statement": [
                      {
                      "Effect": "Allow",
                      "Action": "iot:*",
                      "Resource": "*"
                      }
                      ]
                      }
Now we are done with IoT Core setup. We can now proceed to setup our gateway.
We can follow this link
for
setting up raspberry pi.
Once raspberry pi is booted up, we can now start coding our gateway to make it communicate to
PLC and send data to AWS IoT Core.
Lets implement ModbusRead class which will be used to read data from modbus registers:
                  from pymodbus.client.sync import ModbusSerialClient

                  import time
                  import logging

                  logging.basicConfig(level=logging.ERROR, format='%(asctime)s %(name)s %(levelname)s: %(message)s')
                  logger = logging.getLogger(__name__)

                  METHOD = "ascii"
                  PORT = “/dev/ttyUSB0”
                  STOPBITS = 1
                  BYTESIZE = 7
                  PARITY = 'E'
                  BAUDRATE = 9600
                  TIMEOUT = 1
                  COUNTER = 0

                  class ModbusRead():
                  def __init__(self):
                  self.params = dict(
                  method=METHOD,
                  port=PORT,
                  stopbits=STOPBITS,
                  bytesize=BYTESIZE,
                  parity=PARITY,
                  baudrate=BAUDRATE,
                  timeout=TIMEOUT
                  )
                  self.client = ModbusSerialClient(**self.params)

                  def connect(self):
                  try:
                  self.client.connect()
                  return True
                  except:
                  logger.error("--------No PLC connected-------")
                  return False

                  def disconnect(self):
                  try:
                  self.client.close()
                  except:
                  logger.error("Exception in disconnect Block of Modbus Read code")

                  def read_reg(self, address, count):
                  try:
                  val = ""
                  val = self.client.read_holding_registers(address, count, unit=0x01)
                  value = val.registers[0]
                  return value
                  except:
                  return 9999

                  def get_Register_Values(self, address):
                  try:
                  value = self.read_reg(address, 1)
                  return value
                  except:
                  logger.error("Exception Occured in get Registers Value Block")

                  def put_Register_Value(self, address, value):
                  try:
                  self.client.write_register(address, value)
                  return True
                  except Exception as e:
                  logger.error("Exception Occured in Put Registers Value Block")
                  logger.error(e)
                  return False
Lets understand above code.
                    from __future__ import print_function
                    import sys
                    import ssl
                    import time
                    import datetime
                    import logging, traceback
                    import paho.mqtt.client as mqtt
                    from ModbusRead import *


                    IoT_protocol_name = "x-amzn-mqtt-ca"
                    aws_iot_endpoint = "AWS_IoT_ENDPOINT_HERE" # <random>.iot.<region>.amazonaws.com
                        url = "https://{}".format(aws_iot_endpoint)

                        ca = "YOUR/ROOT/CA/PATH"
                        cert = "YOUR/DEVICE/CERT/PATH"
                        private = "YOUR/DEVICE/KEY/PATH"
                        topic = "test/PLCData"

                        logger = logging.getLogger()
                        logger.setLevel(logging.DEBUG)
                        handler = logging.StreamHandler(sys.stdout)
                        log_format = logging.Formatter('%(asctime)s - %(name)s - %(levelname)s - %(message)s')
                        handler.setFormatter(log_format)
                        logger.addHandler(handler)

                        mbRead = ModbusRead()
                        mbRead.connect()

                        def ssl_alpn():
                        try:
                        #debug print opnessl version
                        logger.info("open ssl version:{}".format(ssl.OPENSSL_VERSION))
                        ssl_context = ssl.create_default_context()
                        ssl_context.set_alpn_protocols([IoT_protocol_name])
                        ssl_context.load_verify_locations(cafile=ca)
                        ssl_context.load_cert_chain(certfile=cert, keyfile=private)

                        return ssl_context
                        except Exception as e:
                        print("exception ssl_alpn()")
                        raise e

                        if __name__ == '__main__':

                        try:
                        mqttc = mqtt.Client()
                        ssl_context= ssl_alpn()
                        mqttc.tls_set_context(context=ssl_context)
                        logger.info("start connect")
                        mqttc.connect(aws_iot_endpoint, port=443)
                        logger.info("connect success")
                        mqttc.loop_start()

                        while True:
                        now = datetime.datetime.now().strftime('%Y-%m-%dT%H:%M:%S')
                        logger.info("try to publish:{}".format(now))
                        reg = mbRead.read_reg(2024,1)
                        mqttc.publish(topic, reg)
                        time.sleep(1)

                        except Exception as e:
                        logger.error("exception main()")
                        logger.error("e obj:{}".format(vars(e)))
                        logger.error("message:{}".format(e.message))
                        traceback.print_exc(file=sys.stdout)
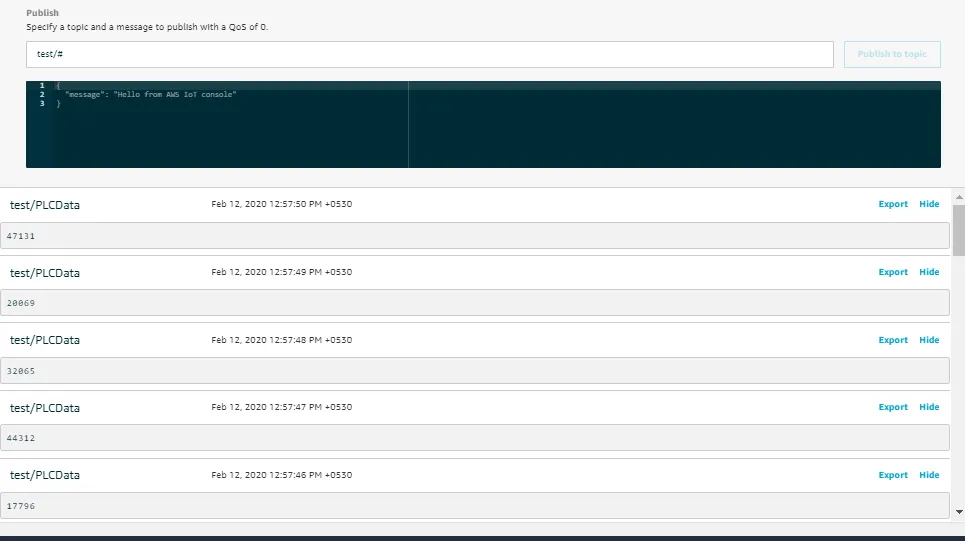
In this post, I’ve shown you how to connect your IoT devices to AWS IoT Core over MQTT on port 443 and sniffing data from PLC. If you have had a constraint in the past to open port 8883 in your corporate firewalls, you can now use a standard port for HTTPS traffic (443) to send your messages over MQTT to AWS IoT Core endpoint.


